Chapter 18 - Advanced multimedia storytelling
Chapter 18 Web version
In the book version of this chapter we cover:
Advanced multimedia storytelling
- Examples of advanced multimedia storytelling
- How multimedia story packages are made
- Software used to make multimedia stories.
Mastering further multimedia storytelling tools including:
- Infographics
- Timelines
- Maps.
Augmented reality – adding active content to static print media
- Examples of augmented reality applied to print products
- How to create your own augmented reality version of stories on your website or in a print publication
- Using QR codes to link to multimedia content.
At the end of the chapter are a range of exercises and projects to enable you to practise what you have learned.
Here you will find:
- Full step-by-step tuition in each of the applications covered here
- Links to alternative software packages
- Essential updates to the tuition contained here.
Always have the book version of Multimedia Journalism to hand while you use this website – the off- and on-line versions are designed to work together.
18C1 Introduction to advanced multimedia storytelling
Snow Fall
www.nytimes.com/projects/2012/snow-fall/
The Jockey
www.nytimes.com/projects/2013/the-jockey/
How The Jockey was made: www.journalism.co.uk/news/how-the-new-york-times-created-multimedia-story-the-jockey/s2/a553899/
Snowden NSA files
Take a look at this from The Guardian: www.theguardian.com/world/interactive/2013/nov/01/snowden-nsa-files-surveillance-revelations-decoded#section/1
Further examples of multimedia storytelling
Killing Kennedy
http://kennedyandoswald.com/#!/rendezvous-with-death-video
What's the big difference between this and the examples we looked at above?
This story, from
National Geographic, is not text based. Rather, audio, video clips and stills are used to tell the story. It uses a split screen technique to compare Kennedy and his assassin, and is underlaid with music. Text appears as an element, in bite-size chunks as you scroll, but never dominates. On some images you can scroll around on them and click on points for images or text information.
10 snowfall-like examples www.mediabistro.com/10000words/10-snowfall-like-projects-that-break-out-of-standard-article-templates_b17340
5 further multimedia story examples www.submarinechannel.com/top-5s/top-5-snowfall-style-stories/
Can you make your own advanced multimedia story packages?
How do I get started?
Snow Fall took many months to create, and required expertise in html and CSS. Such skills are beyond the reach of the generalist multimedia journalist.
In recent years there have been at least two easy-to-use platforms on which you could recreate Snow Fall without knowing any coding. One, Scroll Kit, got into legal trouble with the NYT for demonstrating how to do so in an hour. Read about that here: http://techcrunch.com/2013/05/21/snow-fail-the-new-york-times-and-its-misunderstanding-of-copyright/
Scroll Kit was later bought by WordPress owners Automattic and closed down.
A second software application, Vuvox offered similarly sophisticated multimedia storytelling to non-coders, but it too has closed. At the time of writing, there is no freely available alternative, but it can’t be long before one comes along, and when it does I'll feature it here.
However, there are applications that let us re-create many of the elements of Snow Fall and the other stories discussed above, and we'll take a detailed look at them.
By using a combination of them in a multimedia story, you could get close to the sort of package we have been discussing. So while you read on, and experiment with them, try to think about how you might combine them into a piece of advanced multimedia storytelling.
How the BBC approaches multimedia storytelling
An example: www.bbc.co.uk/news/special/2014/newsspec_7617/index.html
What the BBC does and why:
www.journalism.co.uk/news/how-the-bbc-approaches-longform-immersive-storytelling/s2/a557573/
Software that enables you to create multimedia packages
Cody Brown's account of how he replicated Snow Fall with a piece of software called Scroll Kit, and why he had to take it down: https://medium.com/meta/the-new-york-times-told-me-to-take-this-down-503b9c22080b
18C2 How to make infographics
An infographic that explains why infographics are important for storytelling:
http://naldzgraphics.net/tips/reasons-why-infographics-are-important/
Examples of infographics
The examples here are taken from Piktochart's guide.
Find its full tuition here: http://support.piktochart.com/hc/en-us
You'll also find sources there for stats that you can use in infographics.
Building an infographic with Piktochart
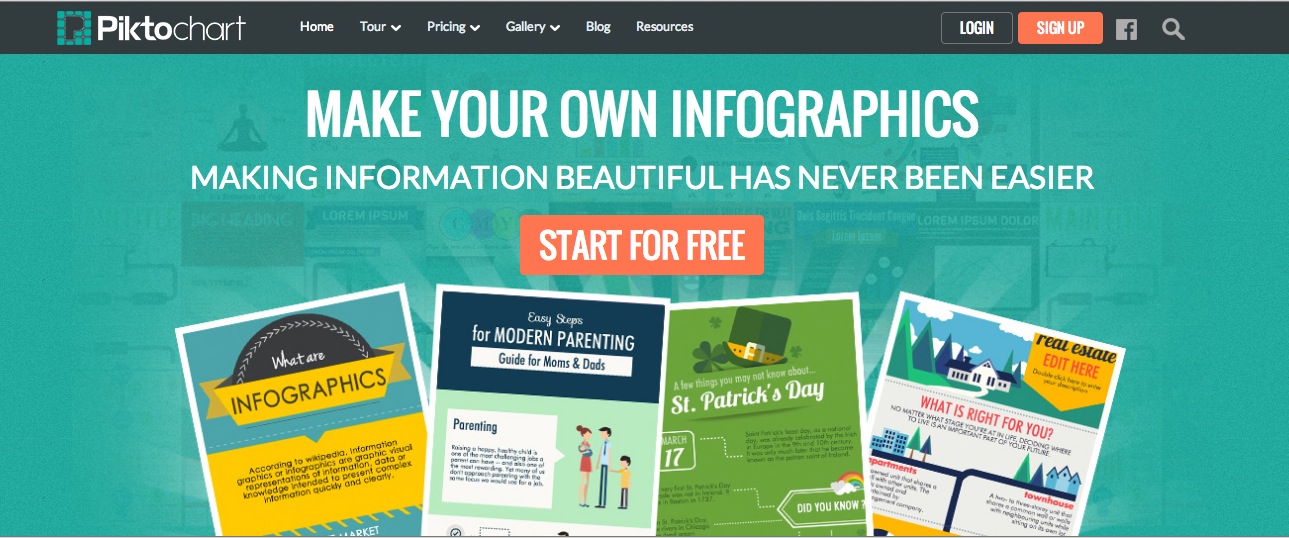
I'm choosing Pikochart for this demonstration, but other tools with free options are available.
Videos on how to use Piktochart are available at the company's YouTube channel: www.youtube.com/channel/UC0miFingOVhM_gPGPb-rEkA
You can begin with a blank template, or use one of Piktochart's and adapt its colour scheme and layout to suit the information you need to present.
You can preview each before you decide, and then customise to fit the content you have.
You work on what Piktochart calls a canvas. The tools you need to add content to your infographic are in the panel on the left. You can select icons and images from a library, or upload your own. Another button lets you select a background image or colour. There's a text button, and under the Tools one you can get maps, charts and embed a YouTube video by pasting in the URL.
To work on a given area or text box you click to highlight it. During editing you can preview and, when you are done, download as a pdf or image, get the embed code to add it to your WordPress site or elsewhere, and share on social media.
18C3 How to make interactive timelines
Dipity
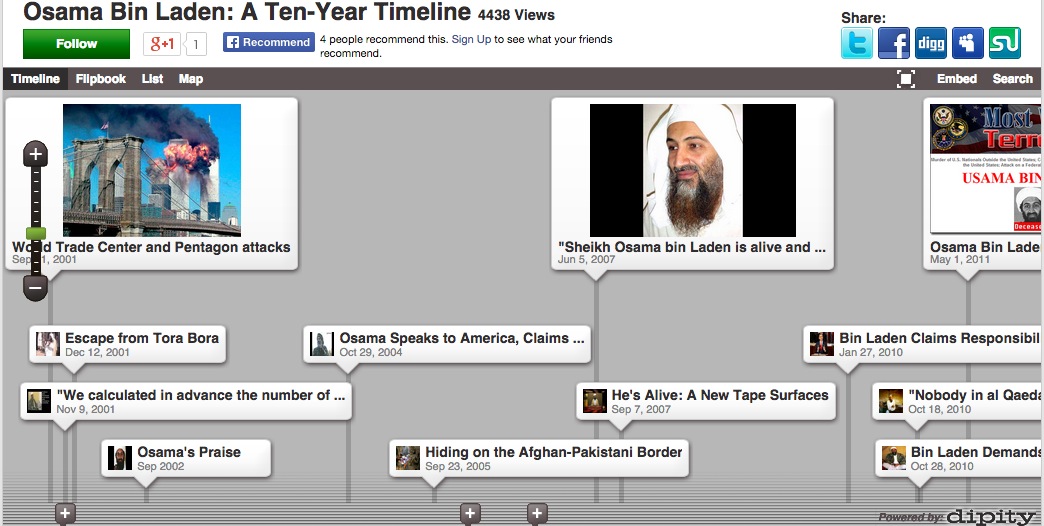
Examples of Dipity timelines
World War II: www.dipity.com/jamesblackburn/World_War_II/
US presidents: www.dipity.com/timeline/Us-Presidents/
US immigration and deportation policies: www.dipity.com/timeline/Immigration-Deportation/
A video tutorial in using Dipity
A video on permissions
A step-by-step guide to using Dipity
You may well not need to use Dipity's instructional video, it's such a simple piece of software to use.
You just click to create your timeline, name it and add in some details, then get building.
Each time you click to add an event on your timeline you get an interface into which you fill in the essential details that enable that element to be pulled in, including adding images, videos, links and location, where relevant.
You can adjust how much of your timeline is visible – a few days, a week, a month or more.
Embedding is easy, just customise the dimensions of your player if you need to, and the appearance if you like, then take the embed code.
A personal free account allows you to create three timelines a month and add up to 150 events. You can pay if you want more.
18C4 How to tell stories via maps
![]() Find an explanation of storytelling via maps that puts the following examples and tuition into context.
Find an explanation of storytelling via maps that puts the following examples and tuition into context.
Boston Marathon bombings, from The Guardian
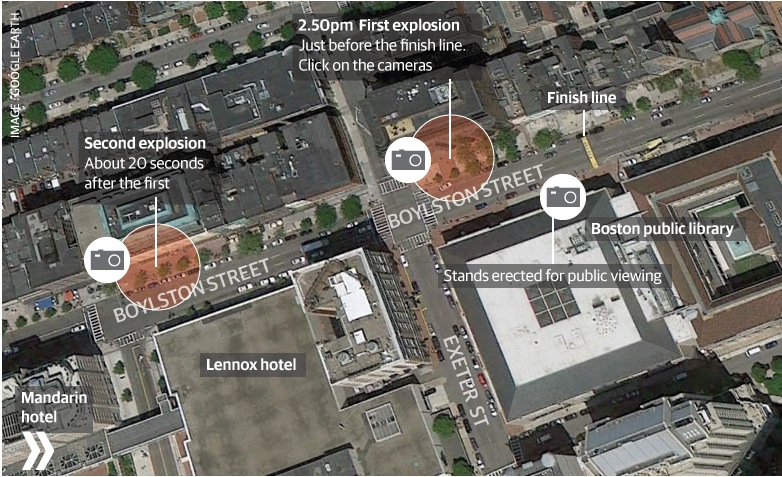
www.theguardian.com/world/interactive/2013/apr/16/boston-marathon-explosion-map-interactive
An example from the Texas Tribune
www.texastribune.org/library/data/redistricting-viewer/
It gives a geographic representation of the areas represented at various levels of government.
The Brighton Argus Olympics torch map
www.theargus.co.uk/news/special/sussex_torch/map/
Mapping gunfire near schools
http://datatools.urban.org/features/everydayviolence/
This map mashup combines information on gunfire and school locations in Washington DC.
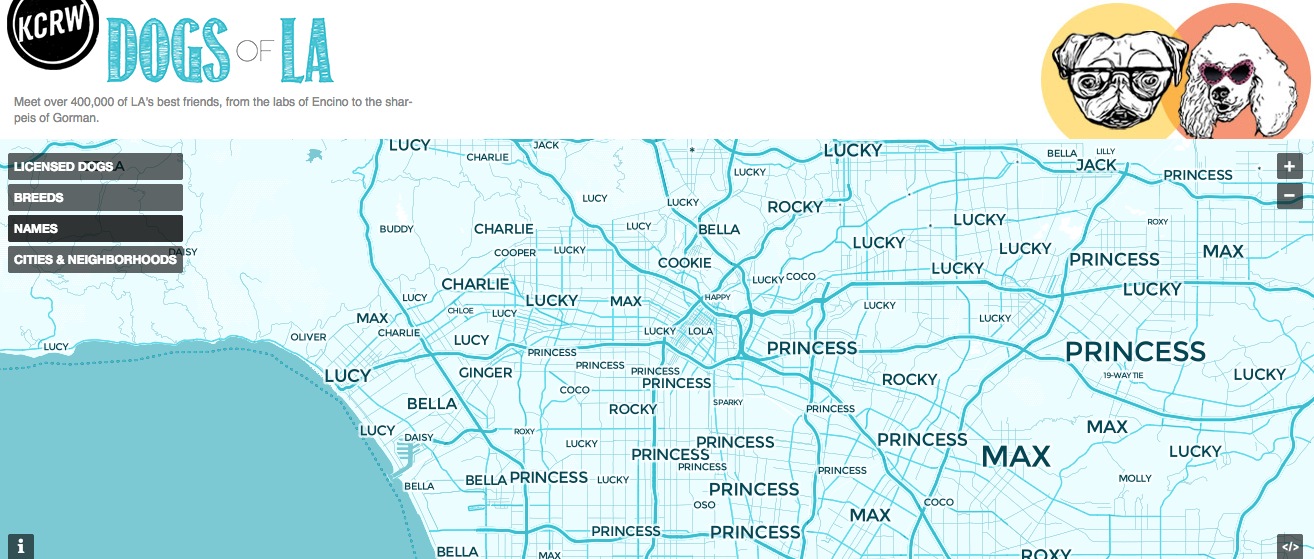
The dogs of LA
http://blogs.kcrw.com/whichwayla/dogs-of-la-fullscreen
More examples
The Berlin map of football fandom
http://interaktiv.morgenpost.de/fussballkarte-berlin/#11/52.5179/13.4699
As Google Map Mania (http://googlemapsmania.blogspot.co.uk/) points out, In terms of support of its football teams, Berlin is still a divided city. What does it say about other – perhaps hidden – divisions within the city? From this map, we don't know.
Budapest’s bike sharing scheme
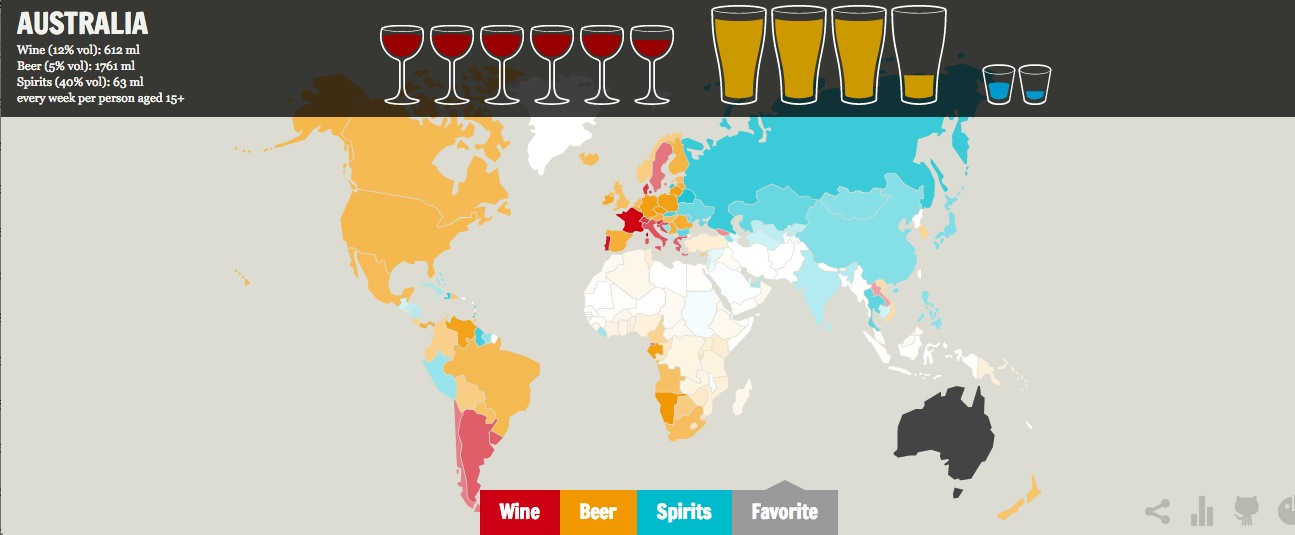
Alcohol consumption around the world: who drinks beer, wine or spirits where.
http://ghostinthedata.com/alcoholmap/
Applications that let you tell stories via maps
Google maps
This links lead to what amounts to a full guide to using Google maps for storytelling:
Google map engine www.google.com/get/mediatools/visualize.html
Google's guide to making maps https://support.google.com/maps/answer/62843?hl=en
Adding rich media guide
There are several alternatives to Google Maps, including:
- Storymap JS from Knightlab http://storymap.knightlab.com/
- Storymaps http://storymaps.arcgis.com/en/
- Henagoo http://heganoo.com/
- ThingLink www.thinglink.com/signup?buttonSource=4dots
Using StoryMapJS
![]() Find a full assessment of StoryMapJS
Find a full assessment of StoryMapJS
Help: Go to http://storymap.knightlab.com/ and click the Help tab on the top nav bar.
Their show me how: http://storymap.knightlab.com/gigapixel.html
Examples of the use of StoryMapJS
A guide to a new road
Hong Kong: A key ivory trade hub http://extras.thetimes.co.uk/public/2014/maps/15-02/Ivory_Storymap.html
An example from me
I've created a map that is a guide to the remote churches and pubs of an area of southern England called Romney Marsh.
My first page is a general introduction to my topic. Here, and on subsequent pages, I add text, a headline, images, and can add links. I must also use the search box in the map at the top of my editing template to identify the location I am writing about.
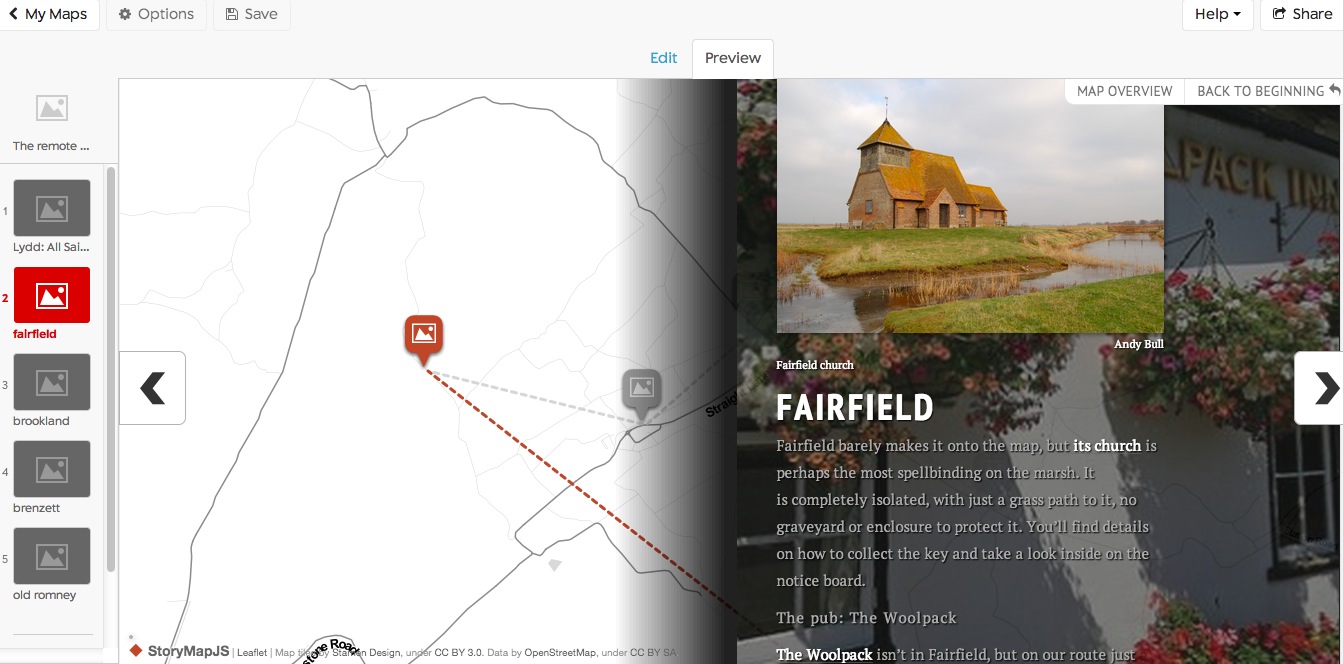
I do that for each page I add. Be sure to preview and then save each page before moving on.
The map that will appear on my opening page when I have added all my pages and places will be based on the points of interest I have added along the way.
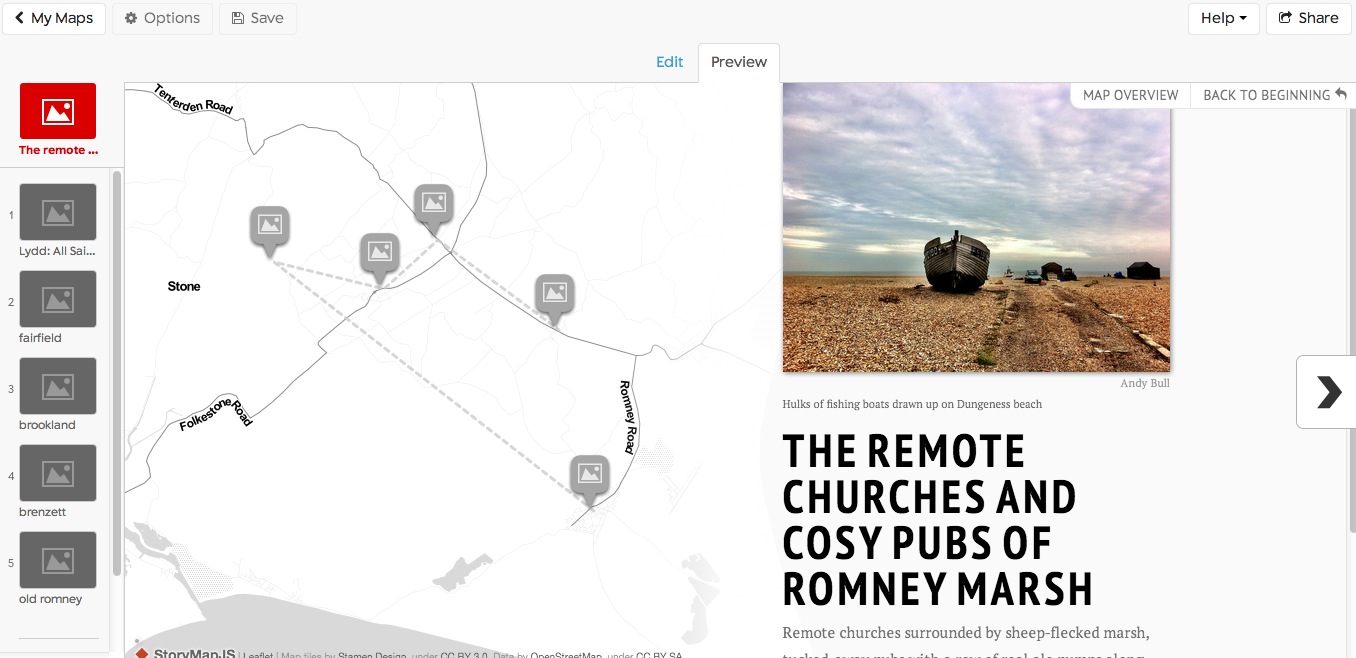
As a reader flips through the pages, the map creates a dotted red line to show them their progress from point to point on the map.
When I am happy I click 'Share', and can pick up the link to my StoryMap, and some embed code.
The embed code is responsive, so it will adjust the size and layout of the interactive based on the space into which it is placed.
Each slide is represented by a pin on the overview map, which also carries a logo to identify whether there is an image, video or just text attached. You can navigate through the interactive from slide-to-slide by clicking the right and left arrows, or by clicking on the pointer for the slide you wish to travel to.
Tuition in using some other story-mapping apps
Quick and easy: ThinkLink
www.thinglink.com/signup?buttonSource=4dots
tutorial www.thinglink.com/tutorial/Standard%20features%20tutorial
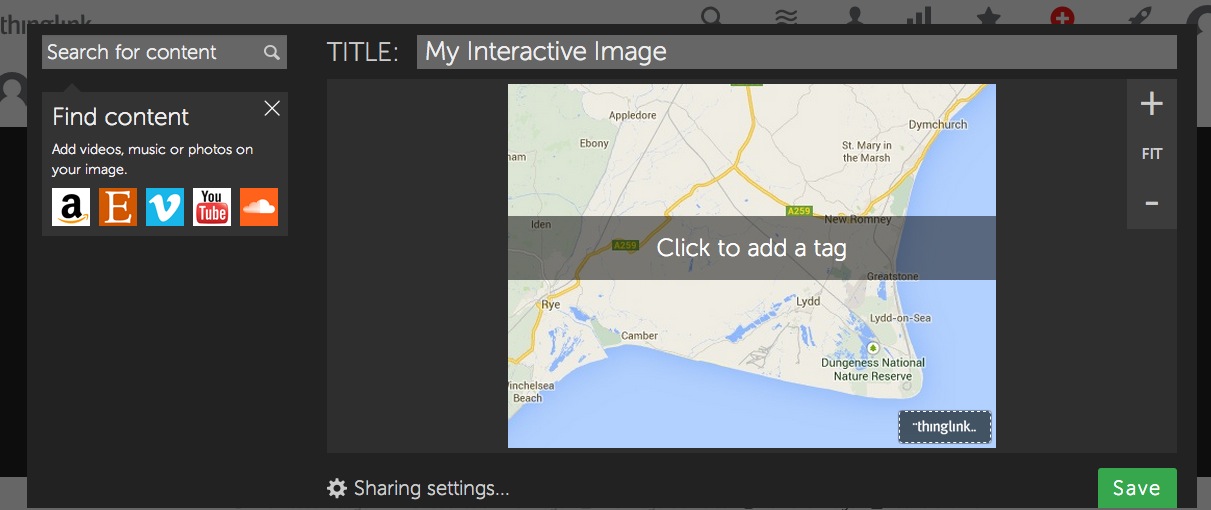
ThingLink offers a very quick and easy way to add rich media to a map or image.
You pick a map or background image and load it into the editing area. Then you add links to rich media onto the image or map, either using your own content via its URL, or searching for and uploading it from a wide range of sources.
A map's an obvious background, but you might have a panoramic shot of, say, a motorway pile up, and add links to what you know of each individual vehicle and person caught up in the mayhem.
Once you are finished you click to publish and pick up the embed code.
The Manchester Evening News created an interactive image on ThingLink to show how the city had changed since 1950
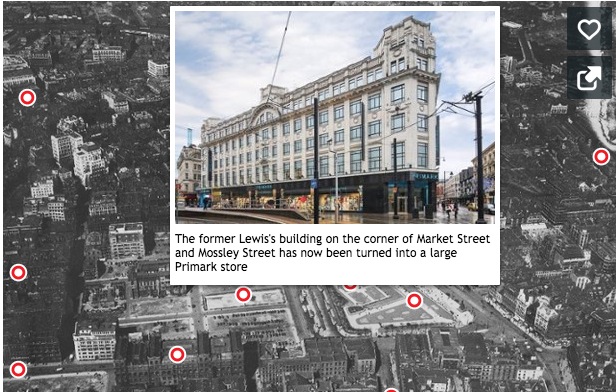
www.manchestereveningnews.co.uk/news/nostalgia/manchester-city-centre-interactive-map-7309381
ThingLink on WordPress
There is a ThingLink Wordpress.org plugin that lets you link rich media to any image on your website. They say: "Go to your blog, hover over any image and start tagging your images by clicking the Edit tags icon. Make sure you are logged into Thinglink in order to tag images. When publishing new posts, you can also tag your images in the WordPress Preview mode," but not from within the editor.
Storymaps
http://storymaps.arcgis.com/en/
Explanation of the platform: http://storymaps.arcgis.com/en/articles/what-is-a-story-map/
Example from the Washington Post: How the Islamic State is carving out a new country
http://apps.washingtonpost.com/g/page/world/map-how-isis-is-carving-out-a-new-country/1095/
Suggested for use for either sequential, space-based narratives or a curated list of points of interest.
18C5 Adding augmented reality to your print publications
![]() Find an explanation of how Aurasma works and a discussion of how best to use it for journalism.
Find an explanation of how Aurasma works and a discussion of how best to use it for journalism.
Step-by-step guide in using Aurasma to add augmented reality to your print product
Here's Aurasma's YouTube channel, with a range of video guides, including an overview: www.youtube.com/user/AurasmaLite
This video (www.youtube.com/user/AurasmaLite) is Aurasma’s own 10 minute guide to using the app. Embedding has been disabled on it, but if you set up Aurasma properly, you'll be able to see that video simply by pointing your camera at a still I'm going to include shortly.
Getting started with Aurasma
There are two preparatory steps before you can start making your own augmented reality content with Aurasma.
First, you need the Aurasma app on your phone or tablet for the trigger image to be activated, and for the secondary media to be loaded. So the first step is to download it.
Second, you need to get access to Aurasma, because you create your media through it. Go to: www.aurasma.com/ and fill in the application. Any journalist can use Aurasma for free, provided your application is approved. Mine was within a few minutes, so hopefully yours will be too.
Once your application is approved, you’ll get an e-mail with your sign-in and password. That takes you to what they call the Aurasma Studio, were you create your augmented reality.
Two more essential steps.
So that you can see the content I make as I demonstrate the Aurasma app, you'll need to subscribe to the channel I am putting it in. To do that, you need to do two things:
1 Have the Aurasma app loaded on your phone or tablet.
1 Open a browser on your phone or tablet and type in the following URL to my channel, which is called Multimedia Journalism.
Here's the URL: http://auras.ma/s/1jTFO
Click to go to that page and the app will open.
When it does, point your camera at the picture below.
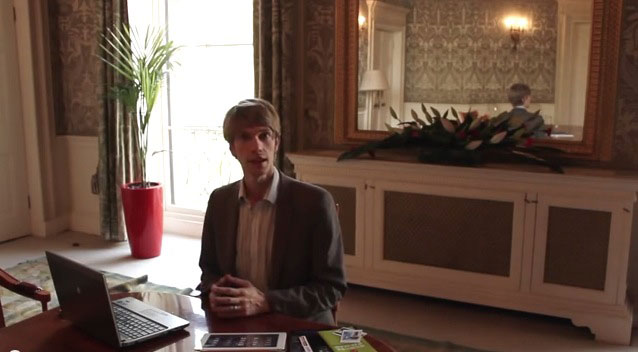
You should see revolving blue circles, the world 'loading' and then a video should begin to play. Give it a few seconds, and make sure you have the whole of the image visible in your camera's viewfinder screen.
It's the video that is linked to at the start of this section. If you haven't watched it before, it's worth taking a look now.
Now you have Aurasma working, let's go through the process of creating content.
How to create augmented reality with Aurasma
There are three essential building blocks to creating augmented realty content with Aurasma:
- Trigger images
- Overlays, and
- Channels.
Trigger images are the still pictures a user has to scan with their phone to unlock the augmented reality content associated with them.
Overlays are the content you link to the trigger image – usually a video.
Channels are the places you put your content for publication, so users can find it.
Now, let’s create a piece of content
If you can, find a story of your own for which you have text, a still and a short video. Don’t worry if you can’t do that. For this exercise, you can use any picture and any video you have access to, just to see how things work.
Selecting your trigger image
The image you choose must be available to those who want to share with. So a print publication is an ideal place to create trigger images.
For this demonstration I’ve added some images in this tutorial that link to video content.
So first we select a trigger image. You need that image to be on your computer. In Aurasma Studio click the Trigger image icon. Then click ‘add’ then ‘browse’ and select the image you want from your computer.
Here’s the one I’m using, from an old story, for this demonstration:

That image is known as an Aura, and if you hold your phone up before it, with the Aurasma app open, the video should play.
By default, video is loaded on a loop, but you can over-ride that. You’ll see a process which Aurasma calls 'training' taking place as the trigger image you have selected is processed. At this point you may get a warning that the image is substandard in some way.
Problems with trigger images
The trigger picture is key, but Aurasma is picky about what it will accept. A picture which is too dark, or with too much text or too many areas of similar colour, won’t work as a trigger.
So a still from the video I want to use in this augmented reality wasn’t acceptable. In another context I planned to use the cover of the MMJ textbook as a trigger, but that was no good because it had too much text and areas of similar colour.
If you`re warned that there is a problem with the image, find another, because otherwise, when your users come to scan the trigger image, your rich content won’t load. Give your image a name and a description.
The overlay
The overlay is the content you want the trigger image to link to.
Usually that is a video, and you again need to have that video on your computer. You can’t, for instance, simply get the URL of a YouTube video and use that. If this is a problem, and you need to first download a published video to your computer, you’ll find how to do that for Firefox here (www.downloadhelper.net/), and for Safari here (http://hints.macworld.com/article.php?story=20070420014456930).
So, next, select the overlays button. Then click add, and add again, and browse for the video you want to upload from your computer.
Give it a title and click save.
Uploading can take a while. If you are using Google Chrome, you’ll get a download percentage indication to show you how things are going. Once it’s uploaded the video will play in the interface.
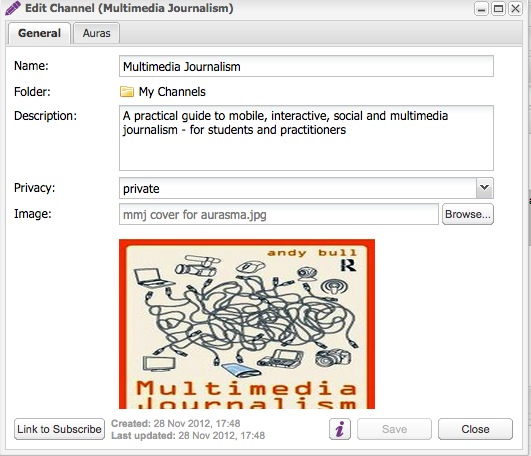
Channel
Next, create your channel, by clicking on the Channel icon. Then click add, and name it. You can also add new content to an existing channel. If you add a description, users will know what they’ll find in your channel. Here are mine:
Channels can either be public, and findable by anyone using Aurasma, or private. Private channels are only accessible to those who have the URL. Here’s the URL to my channel again: http://auras.ma/s/1jTFO
Attach an image to your channel, then select save.
Publishing your content
Your trigger image plus overlay create what Aurasma calls an Aura.
It is this combination of image and video that makes your augmented reality content work.
Adding auras to your channel
With your channel open, select the ‘add auras’ tab. You give the aura a name, add the trigger image you want and the relevant overlay video.
When you name your aura, you can give an indication of where a user can find the trigger image. If it comes from, say, page 20 of your newspaper of today’s date, include that information in the name, so they know where to go.
Next, select the overlay option and add the video you want. By default, the video will fill the area of the trigger image. But if you right click, you can select ‘restore aspect ratio’ to get it back to the dimensions intended. You can also move the overlay around the image so it appears where you want it to.
Once you’ve done that, the 'overlay properties actions' interface comes up. You can add actions here, such as that, if users tap once on the image, they are taken to a relevant URL.
This means you can use your trigger image as the gateway to, say, a live blog on a developing story, or simply to the latest from your website on what they are reading in print.
Then press save.
Sharing your Aura
Select the channels icon and bring up your channel. Then select edit, and there is an option to ‘click on link to subscribe’. You can share that link. Here’s mine again http://auras.ma/s/1jTFO
When that URL is activated on a mobile device with Aurasma installed, it will automatically open up the app and link you to the channel. Hover the app over the trigger image and the Aura will play.
What we’ve looked at so far is only intended to be a demonstration of how Aurasma works.
If you like it, you should design an assignment around it. It has great potential for any magazine or newspaper that wants to turn their print product into a dynamic, interactive property.
For instance, a newspaper reporter can make a video to support a text story and make the still image that accompanies the story in print trigger the video.
Newspaper billboards could be turned into trigger images.
Sign up for a paid option and you can avoid the step of sharing a URL and having users subscribe to a channel. Then, any image with an Aurasma logo on it would activate without a subscription.
Using QR codes to link to multimedia content
QR – for Quick Response – codes are springing up all over the place, particularly on adverts.
Never heard of or seen them? Well they look like this:

To read them you do three things:
- 1 Install a QR code reading app on your phone – and there are loads to choose from in the app stores
- 2 Open the app, which opens your camera
- 3 Point the lens at a QR code and the information linked to it opens.
- That could be a web page, an app, a video clip, a business card, your contact phone number which is then dialled. In fact, it could be pretty much anything.
A QR code is a very convenient way to get people who are on mobile devices to take a look at your content. They don’t have to find your app’s URL, nor send it to their phone.
So wouldn’t it be a good idea if you could link in this way from print and from static websites to your mobile ones?
You can, but you have to be able to write QR codes – generate them – so that others can then read them.
So you need a QR writer as well as a reader.
Sometimes these can be present in the same app, other times you need separate writers and readers.
While there are loads of QR readers offered to you for free, there are far fewer free QR writers. I am using Kaywa here. Because Kaywa's code reader is only currently available on a limited range of phones, I've also tested out two other QR read-only apps: QR Scanner and QR Reader.
The combination I recommend is Kaywa as your QR code writer and any of the other three apps mentioned for code reading.
Kaywa
Go to http://qrcode.kaywa.com/ and open the app. The interface asks you to paste in the URL of the site or other destination you want to create a QR code for.
It then generates HTML code that you can paste into your webpage or blog. You also see the graphic the coder creates.
Download any reader to your phone, open the app and point your camera at the QR code. The linked content should open up.